Note: Email notifications exist at two levels in your system—at the site level and at the company level. You will access the Company-Level Email Notifications page from the Manage Company page.
MarketDirect StoreFront sends email notifications messages to users in these and similar situations:
● To welcome new registered users
● To provide users with a new password if they have clicked Forgot your password? on the login page
● To send a manual quote for user approval from the Quote Editor page
● To alert buyers when their order status changes
● To alert specified
Print Shop personnel when
there is an MIS communication failure, spending account usage activity,
critical errors in the system, etc.
What you can do with email notifications: |
● Change the sender information (the name and email address from which the notifications will be sent) |
● Change the message body of the notifications (i.e., change the wording in various supported languages) |
● Enable/disable site-level email notifications as needed to suit your business needs |
● Customize the headers and footers for site-level email notifications |
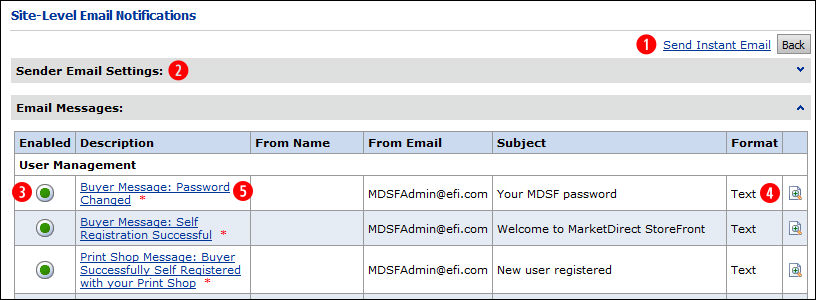
Tip: You can click on any number on the image below to get help on that function.
Note: For a description of each email notification and information about when and to whom it is sent, see Email Notifications-Quick_Reference.
1. Click Send
Instant Email. ![]()
2. Follow the steps in the topic Instant Email Notifications.
Here you specify the default name and email from which all site-level notifications are sent. (To override these default sender settings for a specific notification, open the email’s Description and edit.)
1. In
the Sender Email Messages panel![]() click the Show Details... caret
click the Show Details... caret
 to expand the Sender Email Settings
panel.
to expand the Sender Email Settings
panel.
2. In the From Name field enter the name you want to send the email from.
Tip: The name can be something that lets the recipient readily identify who is sending the message, for instance "John at Print Services" or "PrintCo Customer Service." Note that the default name for certain notifications is "[Your Site Software] Administrator."
3. In the From Email field enter the email address from which you want the email notification to be sent.
Tip: This is the email address to which you want the recipient to send a reply to the email notification (i.e., if you have multiple email addresses).
4. Click Update to save your changes.
Warning: After you click Update, you cannot undo the change but must change it back and update on this screen.
MarketDirect StoreFront enables you to disable any of the site-level email notifications to suit your business needs.
● To disable an email
notification, click ![]()
![]() in
the Enabled column.
in
the Enabled column.
Note:
The ![]() button indicates that the notification
is enabled.
button indicates that the notification
is enabled.
● To enable an email
notification, click ![]() in the
Enabled column.
in the
Enabled column.
Note:
The ![]() button indicates that the
notification is disabled.
button indicates that the
notification is disabled.
1. Click
the preview button ![]()
![]() on
the row containing the notification you want to preview the information
contained in the body of the email notification.
on
the row containing the notification you want to preview the information
contained in the body of the email notification.
2. Click Close to close the preview.
Note:
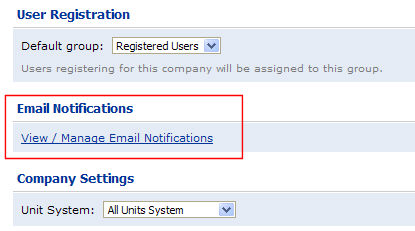
If you are editing company-level email notifications a Use
Site Level Settings checkbox will be available. Check this box
to disable all company-level settings and use the site-level email notification
settings (configured on the Site-Level Email Notfications page). You will
access the Company-Level Email Notifications page from the View
/ Manage Email Notifications link on the Manage
Company page.
For instructions on editing company-level email notifications see Edit
Email Notifications.
Note: For a description of each email notification and information about when and to whom it is sent, see Email Notifications-Quick_Reference.
1. In
the Description column![]() of
the Email Messages table, click the name of the email notification you
want to change.
of
the Email Messages table, click the name of the email notification you
want to change.
2. Follow the steps in the topic Edit Email Notifications.
1. Scroll
down to the Header and Footer Customization panel and click the Show Details... caret
to expand the panel ![]() .
.

2. Check the box Use Header and Footer.
3. Click Customize
to open the Email Customization page.
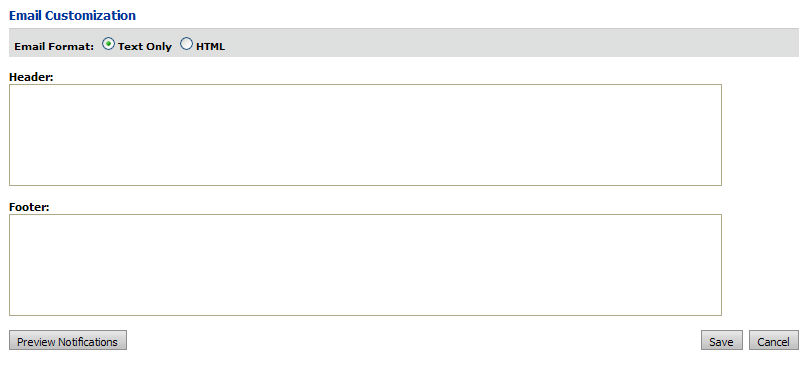
4. On the Email Customization page complete the following:
● Email Format:
● Text Only: Select this option to use plain text format (without HTML formatting options that allow you much greater control over the way in which the notification is displayed).
● HTML: Select this option to format the notification using the advanced formatting capabilities of HTML (e.g., you can change the font type, size, color, format—bold, italic, underline; use numbered and bullet lists; import formatted text from MS Word; etc.).
Note:
If you select this option, the HTML
rich text editor will open. You will have the option of using the rich-text
editor in Design
![]() mode
(using the familiar controls of a word processor such as Microsoft
Word) or in HTML
mode
mode
(using the familiar controls of a word processor such as Microsoft
Word) or in HTML
mode ![]() mode. You can also preview
mode. You can also preview ![]() the
notification before saving it to see how your formatting options will
look to the recipient.
the
notification before saving it to see how your formatting options will
look to the recipient.
● Header:
● If you chose Text Only format: Enter the text you want to be displayed as a header for all MarketDirect StoreFront-generated email notifications.
● If you chose HTML format: From the pull-down list select the storefront whose logo you want to use as the customized header.
Note: For information on specifying a logo for a storefront, see To customize the storefront branding logo banner.
● Footer: Enter the text you want to be displayed as a footer for all MarketDirect StoreFront-generated email notifications.
Tip: An email footer is a great place to use deep links to products you want to promote. For information on how to use deep links to products (including the procedure for directing prospective buyers to a Visual Product Builder product's ticketing page, (i.e., an enhanced buyer product ordering page that combines ticketing with preview) without their even having to click Begin see Product Deep Links. You can also add links to product categories (for more information, see Category Deep Links).
● If you chose Text Only format: Enter the text you want to be displayed as a footer for all MarketDirect StoreFront-generated email notifications.
● If you chose HTML format: Use the advanced formatting capabilities of of the HTML/rich text editor to format your email footer.
Note: You can add images to the footer using drag-and-drop of an image from another Web page directly into the HTML/rich text editor. To format the image after adding it, right-click and select Set Image Properties or Image Map Editor to format the image using standard HTML image editing functions.
5. Click Preview Notifications to see how the header and footer will look.
6. Click Save.