SmartStores are the second generation of storefront design in MarketDirect StoreFront (introduced in v. 7.0). SmartStores are next generation platforms for building product catalogs and storefronts that use HTML5, AJAX, and other responsive technologies that enable the storefront to scale smoothly from desktop to mobile devices. SmartStores are buyer interfaces for your Web site that site administrators can tweak using the SmartStore Builder's customization toolset. These tools let administrators and site designers customize the layout of page elements and edit the site's HTML and CSS (cascading style sheets). SmartStores offer greater flexibility for defining the design and layout of storefronts.
Building a SmartStore storefront using the SmartStore Builder involves six main tasks:
● selecting a design (layout and style)
● adding a branding logo
● defining product and category sections
● setting up a promotional banner
● editing page elements and styles
● associating companies with the storefront
Note:
Important Note on SmartStores Web Browser
Support: SmartStores will work only on the following browsers:
— Internet
Explorer 10+
— Google Chrome
— Mozilla Firefox
— Apple Safari
— Opera
SmartStores will not work on Internet Explorer 7, 8, or 9.
Note:
The supported image formats are JPG, GIF, PNG, BMP.
The recommended size is 250 pixels by 70 pixels.
Image file size should not exceed
2 MB.
To save time when creating a new SmartStore based on an existing SmartStore, select the existing storefront and then click Duplicate SmartStore.
Duplicating a SmartStore copies specified elements from the existing SmartStore to the new one. You can use the duplication feature for two main tasks:
● To jump start creation of a similar storefront (a variation on a theme). Duplicate an existing SmartStore and then modify it to create the variation.
● To create a back-up copy of an existing SmartStore that you want to edit. That way, if something goes wrong, you can recover the existing site (or page elements).
You can use a SmartStore theme “off the shelf” by adding your logo, selecting the products and categories to offer, and associating it with companies.
You can use the advanced customization tools to edit the look and feel of the site. Customizing your storefronts lets you tailor the branding of a storefront to a particular audience (i.e., buyers associated with a particular company, interested in a certain product line, etc.). With SmartStore storefront customization you can:
● Customize the color scheme to match your corporate identity (CSS style sheet editing).
● Change the typeface and style for heading levels or the color of buttons (CSS style sheet editing).
● Rearrange the layout of elements on a site page (HTML code editing).
● Customize a storefront with tailored branding for users associated with a particular company (CSS and/or HTML editing as well as tailoring the messaging, promotional banners, etc.).
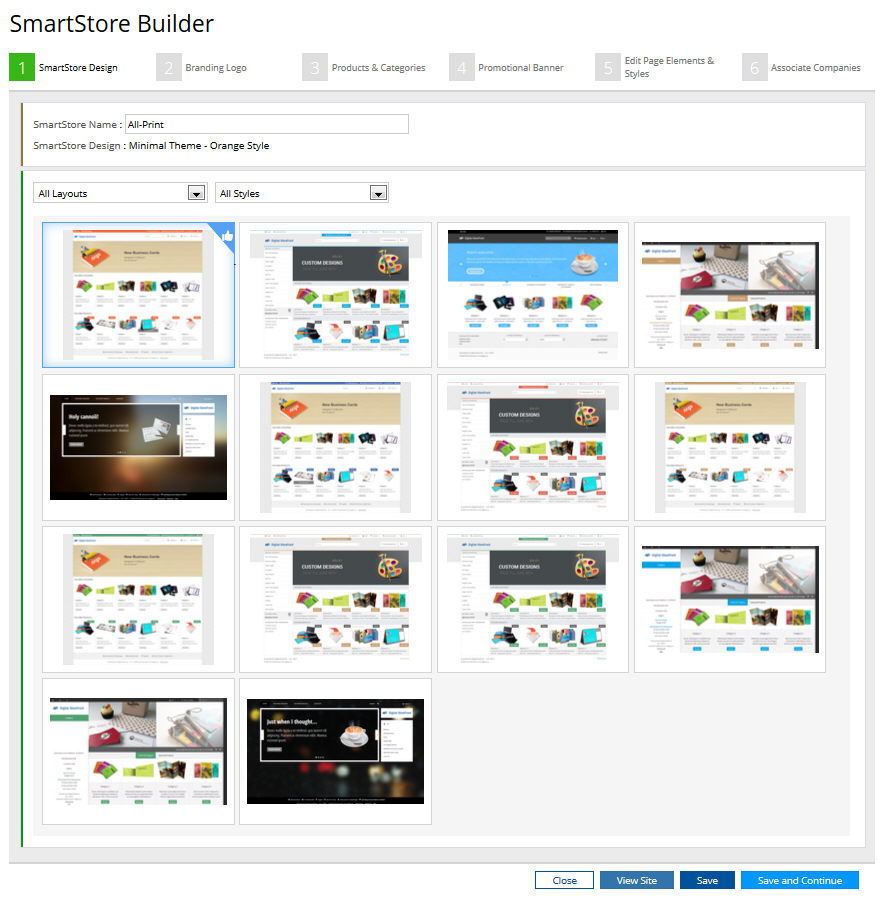
The SmartStore Builder is a 6-step wizard for customizing your site. The steps can be completed in any order.
● Steps 1-4 let admins choose options for customizing the look and feel of the SmartStore including the base design (layout and color scheme), the logo, products & categories, and a promotional banner.
● Step 5 is an advanced editor that gives site administrators control over the site’s HTML and CSS).
● Step 6 lets admins
associate companies with the SmartStore.
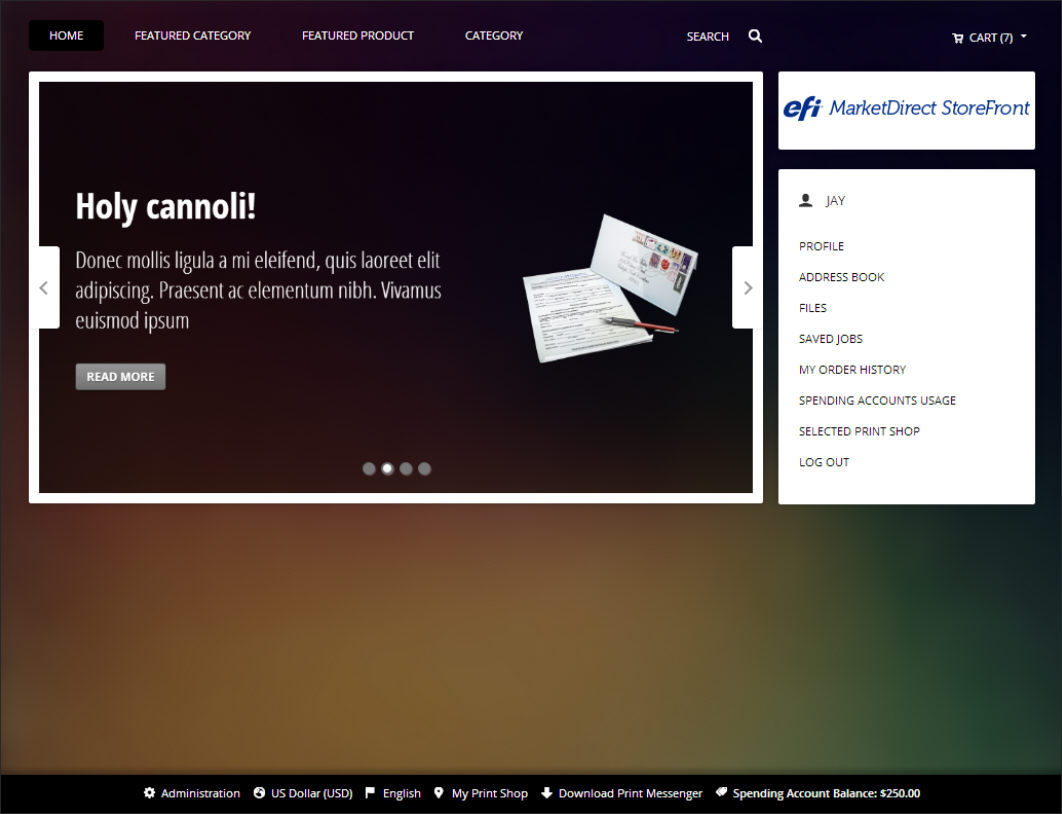
The first step is to select the overall theme (style and layout) of your SmartStore from the available options. MarketDirect StoreFront ships at present with five basic site themes. Each layout has several color themes and was designed to suit a particular storefront type. For instance, the Silk theme shown below is ideal for sites that want to highlight only a small number of products in a dynamic display.
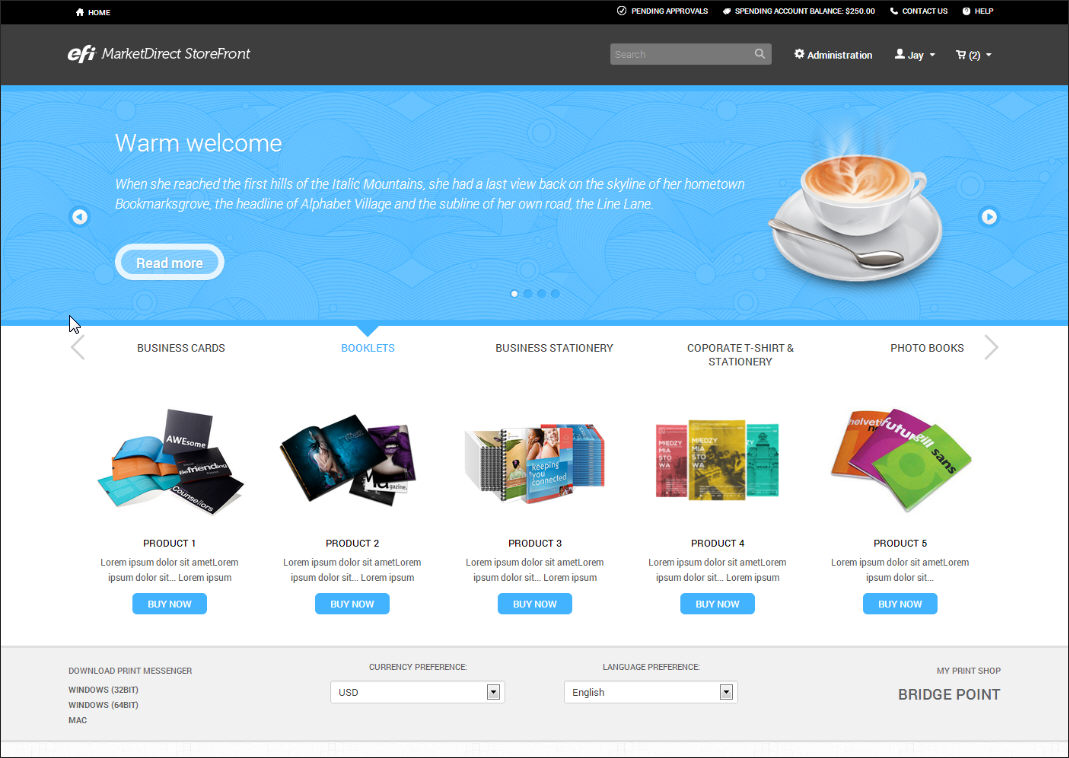
The Minimal theme, with
its prominent display of featured categories and products and large carousel-type
promotional banner, works well for sites with large or small product sets.
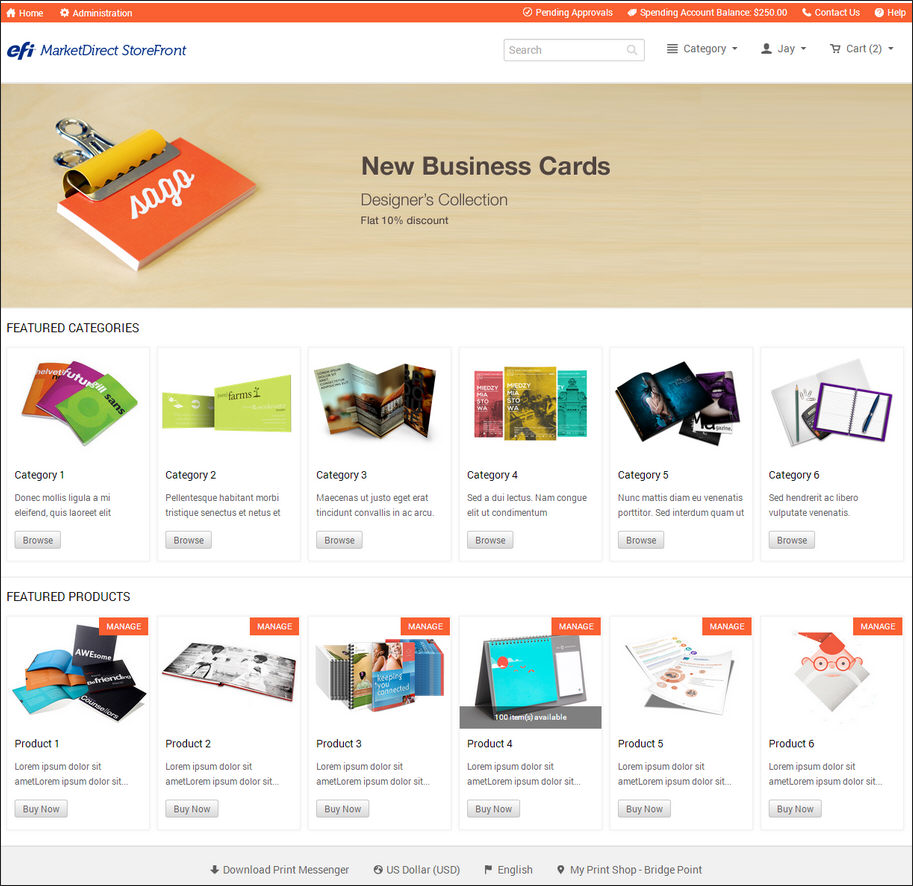
The Mosaic theme is a great
layout for sites with a handful (8-12) of products to highlight.
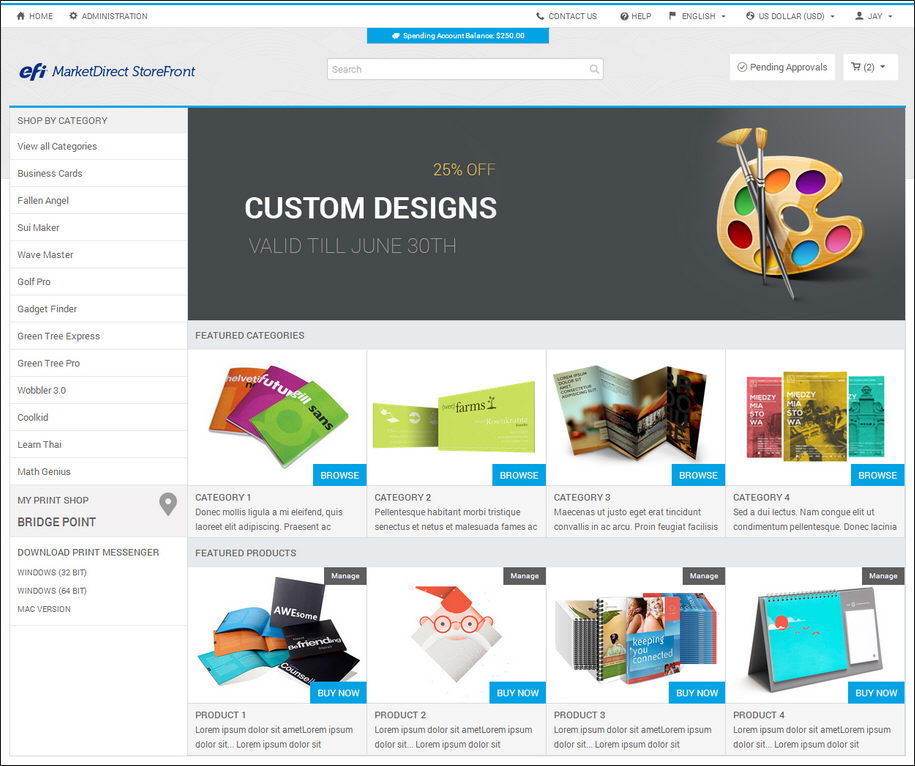
The Matrix
theme is similar to Mosaic but lets users toggle between featured categories
and featured products in a fluid layout.

The Magic theme is ideal
for sites that want to lead with a targeted message.
Note:
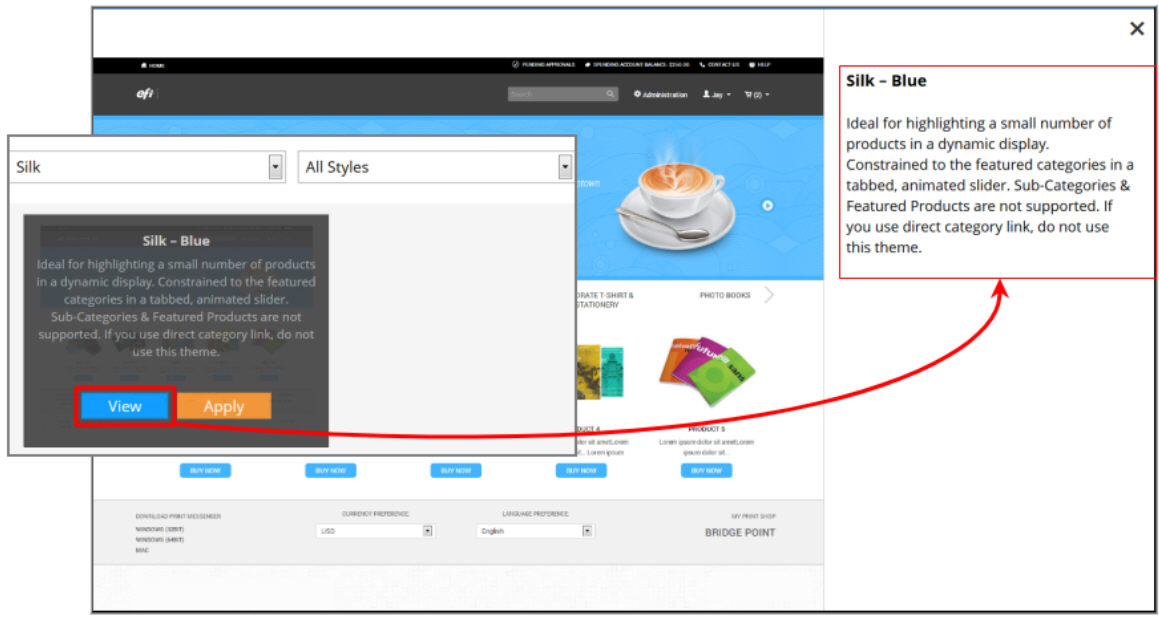
For guidance on which design to choose, after selecting a layout, click
one of the available styles and then hover your pointer over a design
and click View. The description
of the design will help you decide if it suits your needs for the storefront.
1. Select the overall design (style and layout) for the SmartStore, each of which has several color theme options, from the available options by clicking thumbnail images on the page.
Note:
As the number of designs grows, you can use the All
Layouts and All Styles
pull-down lists:
--From the All Layouts pull-down
list, select a layout type. The default selection is All
Layouts.
--From the All Styles pull-down
list, select a style type. The default selection is All
Styles.
● Click View for a closer look at the design.
● Click Apply to apply the design to the storefront.
Note:
The selected design with have a thumbs-up logo in the upper right-hand
corner.
2. Click View Site to open a separate browser window that shows you how the design will appear to buyers.
3. Click Save to select the design for the storefront.
Note:
If you have made any changes to the storefront's HTML or CSS styles (in
5: Edit Page Elements & Styles),
changing the storefront design will cause those changes (such as any new
page elements you added or edits to the HTML code and CSS styles) to be
lost. This action will not affect other elements of the design (such as
the branding logo, promotional banner, products and categories). Note: The action cannot be undone,
so any changes you made that are lost cannot be recovered.
You will have to confirm your decision to change the design and abandon
any changes you have made.
4. Click Save to save your changes or Save and Continue to go to the next step.
Note: You can also click the 2 Branding Logo icon in the SmartStore Builder navigation menu at the top of the page.
1. In
the Branding section: From the
Type pull-down list, select the
type of logo to add to the storefront:
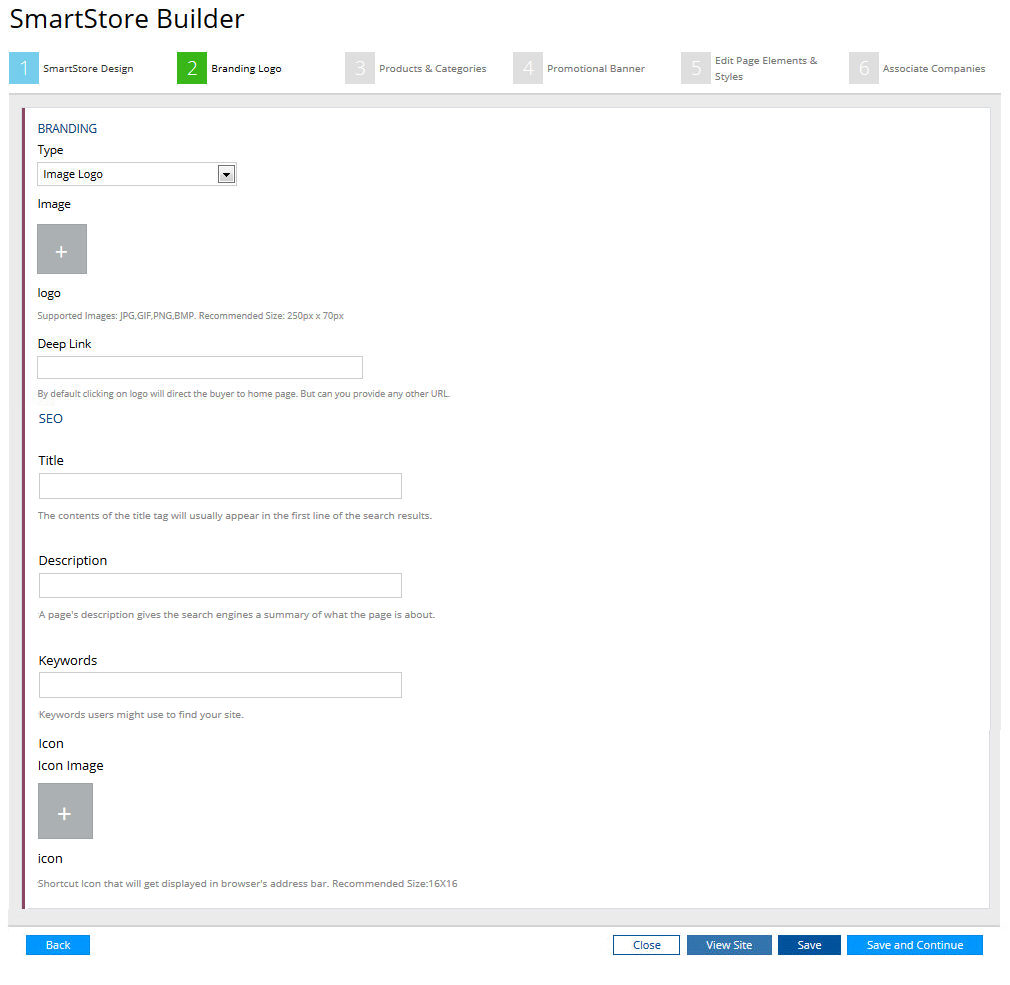
● Image Logo: Select this option to upload an image of your logo.
Note:
The supported image formats are JPG, GIF, PNG, BMP.
The recommended size is 250 pixels by 70 pixels.
Image file size should not exceed
2 MB.
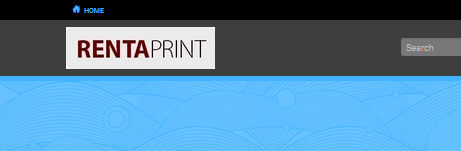
Note:
The image logo will be displayed on the banner of the page. For example,
if you upload a graphic image logo, it will be displayed on the banner
as shown below:
● Click the  .
.
● On the File Upload window, browse to and select the logo image.
● Click Open.
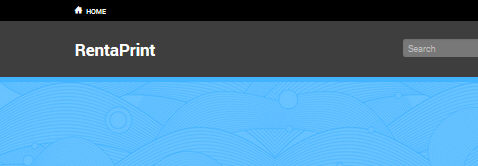
● Text Logo: Select this option to use a text logo for the storefront.
Note: The text logo will be displayed on the
banner of the page. For example, if you enter "RentaPrint" as
your text logo, it will be displayed on the banner as shown below:
● In the Text entry box, enter the text for the logo.
● No Logo: Select this option if you do not want to display a logo on the storefront.
2. In the Deep Link field, enter a link to a Web page that you want to take buyers to when they click on the logo.
Note: By default, clicking on the logo will direct buyers to your storefront home page.
3. To improve the accessibility and ranking of your SmartStore site on the Web via Search Engine Optimization (SEO), complete the fields below to make your site indexable by Internet search engines such as Google:
● Description: Add a descriptive summary of your SmartStore that will be shown beneath the title and URL of your site on the search results page.
Note: This is the descriptive blurb that tells the searcher what your site has to offer with the search terms that matched the users' search terms bolded. Tell the prospective buyers what your site has to offer. Be sure to include any deals, specials, distinctives, or discounts on your products and services to draw buyers to your site (e.g., "Superior Printing offers top-quality printing at guaranteed lowest prices! We offer expert design, mailing, and direct marketing services...").
● Keywords: Enter keywords for your site. Keywords are those terms that prospective buyers looking for the services you offer will be most likely to enter into an Internet search engine such as Google, Bing, or Yahoo!
Note: In addition to including keywords that list your product and service offerings, you might want to include your location if you have a physical location or outlet.
● Icon: To add an icon that will be displayed in a Web browser tab along with the title of your site when a page of your SmartStore is open:
● Click the .
● On the File Upload window, browse to and select the icon image (the recommended size is 16x16 pixels).
● Click Open.
4. Click Save to save your changes or Save and Continue to go to the next step.
Note: You can also click 3 Products & Categories icon in the SmartStore Builder navigation menu at the top of the page.
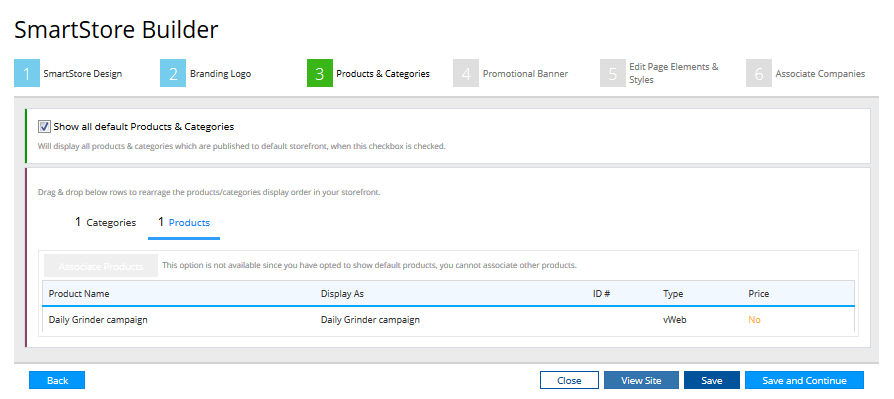
1. Check
the Show all default Products & Categories
check box if you want to display all products and categories that are
published to the default storefront. Unchecking
this option will allow the administrator to manually choose categories
and products for the catalog.
Note: The list of products and categories will stay synchronized with changes to the default storefront. So if you include default products and categories on other (non-default) storefronts, the changes made to the products will be applied across storefronts. (See To set a storefront as the default for more information on default storefronts.)
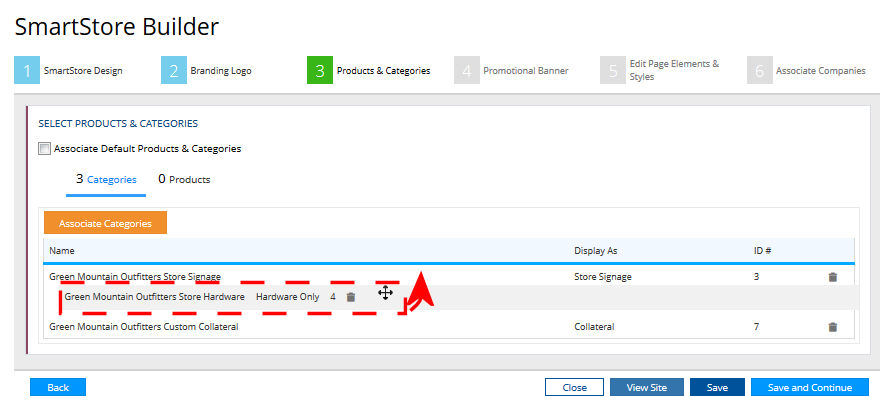
2. To associate categories with the storefront:
a. Click Categories (which is preceded by a number representing the number of categories currently associated with the storefront).
b. On the Add Featured Categories window, select the categories you want to feature on the storefront.
c. Click Save.
d. To
remove a category, click the trash icon  on the row
of the category to remove.
on the row
of the category to remove.
e. To
re-order the categories, left-click on the category and without releasing
the mouse button drag the category up or down in the list.
3. To associate products with the storefront:
a. Click Products (which is preceded by a number representing the number of products currently associated with the storefront).
b. On the Add Featured Products window, select the products you want to feature on the storefront.
c. Click Save.
d. To
remove a product, click the trash icon on
the row of the product to remove.
e. To re-order the products, left-click on the product and without releasing the mouse button drag the product up or down in the list.
4. Click Save to save your changes or Save and Continue to go to the next step.
Note: You can also click 4 Promotional Banner icon in the SmartStore Builder navigation menu at the top of the page.
The Promotional Banner is displayed prominently at the top of the storefront home page. The look of the banner will vary depending on which theme you chose. The images below show the 5 main types of image banners.
Note:
The supported image formats are JPG, GIF, PNG, BMP.
Image file size should not exceed 2 MB.
1. From the Upload Type pull-down list, select the type of promotional banner to add to the storefront:
● No Promotional Banner: Select this option if you do not want to display a promotional banner on the storefront.
Note: A preview of the promotional banner you design will be shown at the bottom of the page. You can also click View Site at the bottom of the page at any time to see how your site will look.
● Image: Select this option to upload an image to be displayed as the promotional banner on the storefront.
Note:
The supported image formats are JPG, GIF, PNG, BMP.
Image file size should not exceed 2 MB.
Note:
Transparency is supported on GIFs and PNGs. In the example below the "Hot
Deals" banner is a GIF with the yellow background set to be transparent.

The image below shows how the banner will be shown on the storefront
with transparency applied to the yellow background.

● Click the .
● On the File Upload window, browse to and select the promotional banner image.
● Click Open.
● Deep Link: Enter a link to a Web page that you want to direct buyers to when they click on the logo.
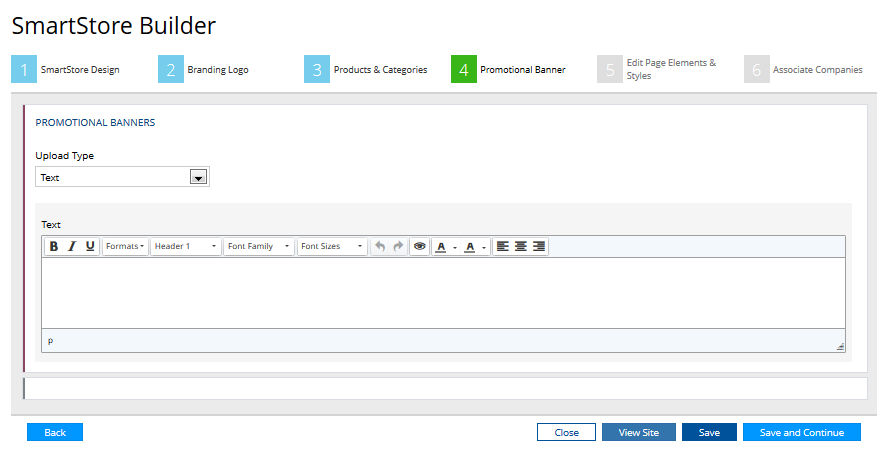
● Text:
Select this option if you want to use a text-only promotional banner.
Enter the text in the Text entry box and format it using the formatting
tools.
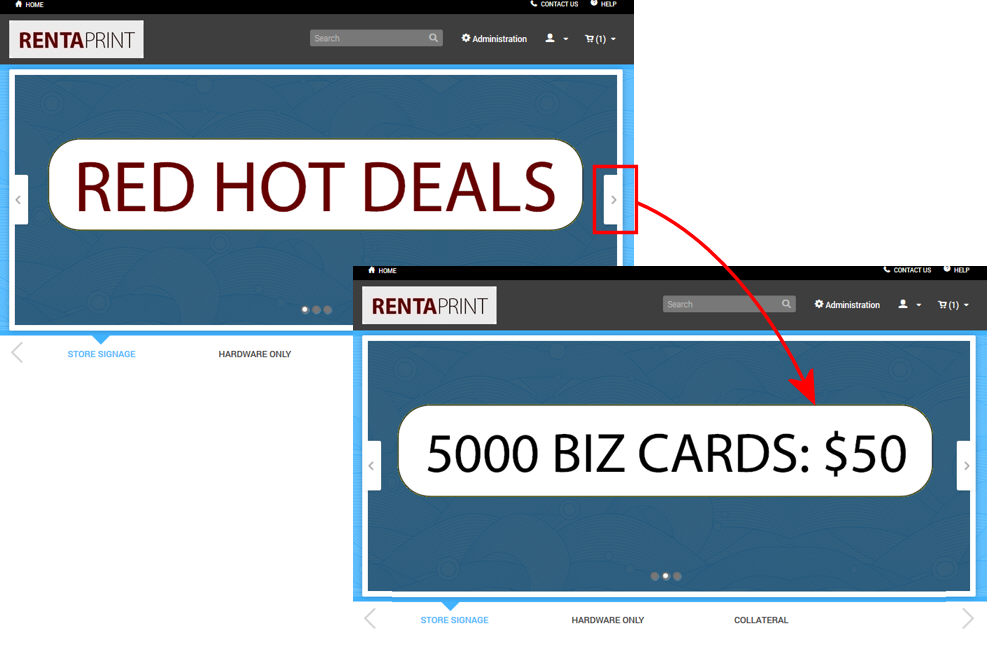
● Carousel
Slider: Select this option to upload
two or more images that will be displayed sequentially like a slideshow
and that can be advanced by buyers' clicking the forward  and back
  arrows.
Note:
The supported image formats are JPG, GIF, PNG, BMP. Transparency is supported
on GIFs and PNGs.
Image file size should not exceed 2 MB.
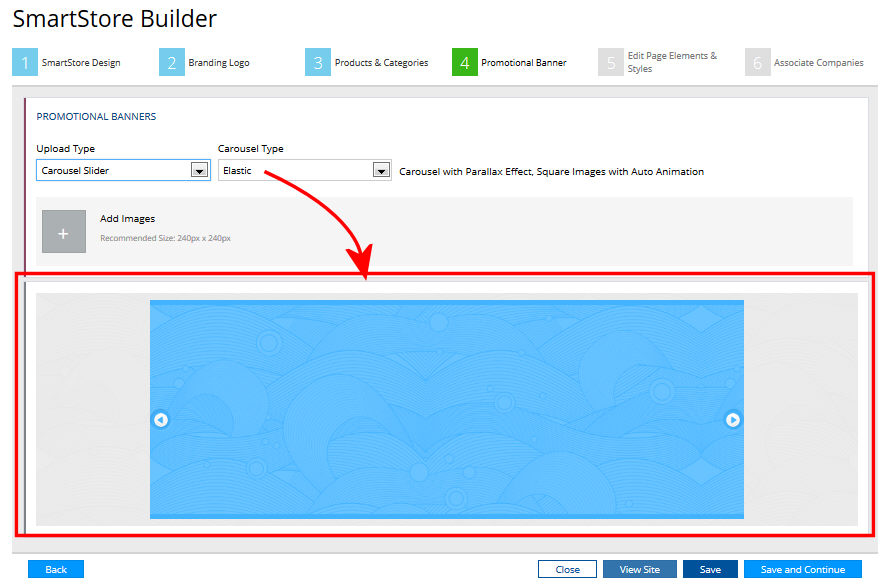
● From the pull-down list, select the Carousel Type.
Note:
The carousel types available will depend
on which SmartStore design you chose. A thumbnail of the selected carousel
type will be shown in the thumbnail pain.
● Click the .
● On the File Upload window, browse to and select the promotional banner images you want to include on the carousel.
Note: You can select multiple images.
● Click Open.
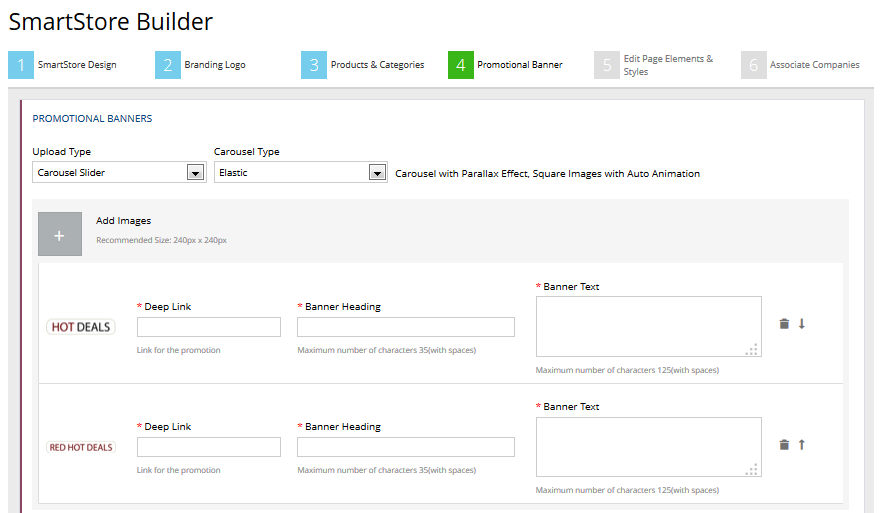
● On the Promotional Banners page:
● Deep Link: Enter a link to a Web page that you want to direct buyers to when they click on the image.
● Banner Heading: Enter a banner heading. This is the headline for the text. Entering a banner heading will cause a READ MORE button to be shown beneath the banner text or image.
● Banner Text: Enter any text you want to be displayed in this slide of the carousel.
● To
remove a category, click the trash icon on the row
of the promotional image.
● To
move the banner up or down (i.e., make it show before or after the other
images in the carousel), use the up and down icons  .
.
2. Click Save to save your changes or Save and Continue to go to the next step.
Note: You can also click 5 Edit Page Elements & Styles icon in the SmartStore Builder navigation menu at the top of the page.
The Advanced Customization tools for SmartStores offer unprecedented and nearly unlimited control over the layout, styling, and content of the site. In giving site administrators and their designated Web design personnel access to the CSS styling and HTML code behind the storefront, SmartStores offer ultimate control over the "look and feel" of the site. Please read the message below before continuing.
IMPORTANT
The advanced customization functionality in the Edit Page Elements &
Styles section is intended for advanced users who are familiar with HTML
code (the mark-up language on which Web pages are based) and CSS (Cascading
Style Sheets), which define how text and other page elements on the storefront
are displayed.
Making changes using the tools in Advanced Customization can result in
problems with the way your site looks and behaves and even render your
site non-functional. If such problems arise, there is an option to revert
the site (pages, templates, and CSS) to the default. Doing so, however,
will cause you to lose any and all changes you have made using the advanced
customization tools and the revert action cannot be undone. Reverting
to the default will cause all advanced customization changes to be lost,
including changes to the CSS styles or HTML elements, addition of new
template sections, changes to the order in which page sections and templates
are arranged, etc. Reverting to the default will not cause changes done
in other storefront customization pages to be lost, such as selection
of theme and design, branding (logo), products & categories, promotional
banner, or company association.
You will be required to agree to the statement: "Revert all edits made to page
elements in this page including HTML changes and CSS styling. Any new
page elements added to this page will be deleted. This action cannot be
undone. This action will not affect other areas like SmartStore design
section, branding (logo) etc." Thus, after the site is restored to
the default version, you will have to redo any customizations you completed
using the advanced customization tools.
PLEASE
NOTE If you make changes
that adversely affect your site that cannot be resolved by reverting to
the default and that require an EFI Professional Services engagement,
you may be charged for the service.
Many primers on HTML and CSS are available free of charge on the Internet
(search "HTML Introduction" and "CSS Introduction"
in the search engine of your choice). If you are not an advanced user
and wish to retain the services of EFI's Professional Services team for
assistance with HTML or CSS, please address your request to EFI's MarketDirect StoreFront Technical
Support team.
● Click Allow buyer to register if you want to enable buyers to register an account by clicking Register in the login section of the storefront.
● LOGIN BLOCK
● Allow buyer to register: This will cause the Register link to be shown in the login section.
● Show Forgot Password link: This will cause the Forgot Your Password? link to be shown in the login section.
● Remember User Name check box: This will cause the Remember User Name checkbox to be shown in the login section.
● Allow buyer to checkout as guest: This will cause the Checkout as Guest option to be shown in the login section.
Notes
on Guest Checkout:
- Guest checkout will be available only for priced products (not those
that require manual quote).
- If you have visual verification (Captcha) enabled, guest buyers will
be subject to it when using guest checkout.
- If your site is integrated with ESC (External System Connector) or an
MIS, be aware that guest account orders may be communicated from MarketDirect StoreFront.
- Guest buyers will be subject to the regular checkout process even if
very rapid checkout is enabled (because the latter does not request a
shipping address).
Guest Checkout Workflow:
If you select the Allow buyer to checkout
as guest, guest users will be able to complete a purchase and checkout
without logging into your site through a one-time guest user account.
After selecting a product and clicking Proceed
to Checkout, the guest buyer will be prompted either to login or
checkout as guest.
Clicking Checkout as Guest will
prompt the guest buyer to enter a valid email address.
Note: The system will validate
the format of the email address entered. This email address will be used
to communicate email notifications throughout the order process.
The guest buyer will then be able to complete the purchase using one of
two payment options (credit card or pay at store) and choosing a shipping
option you have made available to the company.
Note: This Add to Cart Behavior section will be disabled if there is a conflict on CSS style sheet that has not been merged. A message will indicate why it is disabled. The section will be enabled once the style sheets are merged. On category setting page, a static message will be shown that warns about the storefront customization. The message cannot be shown or hidden based on style sheet conflict because the same category can be published to multiple storefronts; thus, it will always be shown.
● Add + Continue Shopping: This assumes that after buyers add an item to the Cart, they want to continue shopping and not go directly to the Cart to checkout.
● Add + Goto Cart: This assumes that after buyers add an item to the Cart, they want to proceed imtely to the Cart and checkout.
● PUBLISHED PRODUCTS
● Items per page (maximum 25): Specify the number of products (1-25) per page to show on the storefront before the page must be scrolled.
● SHOPPING CART CONFIGURATION
● Display x Products: Specify the maximum number of products (1-11) to show in the Mini Shopping Cart in the storefront. If the cart has more than the selected number of products, the buyer will need to open the cart to see all items.
Note: For instance, say you have specified 5 as the maximum number of products, and a buyer has added 8 items to her cart, the mini cart will still show only 5 and the buyer will have to go to the cart to see all 8 items.
● TAXES SETTINGS
Note: This section will be shown only if you are not using VAT taxation. The field below applies only if you are using MarketDirect StoreFronts built-in tax engine. Item level tax is not supported with CCH SureTax, so please make sure this check box is not selected. For more information on MarketDirect StoreFront's built-in tax engine, see Built-in Sales Tax Model.
● Show item level tax in Shopping Cart: Selecting this option will show item-level taxes in the shopping cart.
Note: This section will be shown only if you are using VAT taxation. For more information, see VAT Taxation Model.
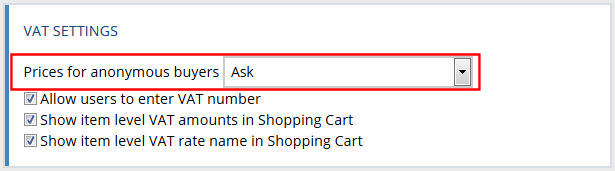
● Price for anonymous buyers:
● Ask: Select this option to ask anonymous buyers
whether to show prices including or excluding VAT in prices.
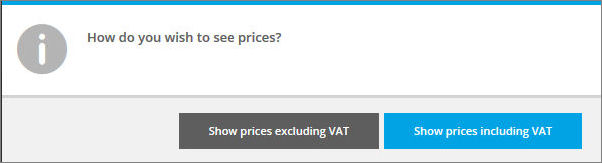
Note: For example: Consumer users will likely opt to show prices with VAT, whereas business users will not.
Note: Note that for anonymous (pre-login) buyers, the Print Shop location is used to calculate the VAT rate.
● Include VAT: Select this option to include VAT in pricing.
● Exclude VAT: Select this option to exclude VAT in pricing.
● Allow users to enter VAT number: Select this option to allow buyers who self-register on the site to enter their VAT numbers and have them associated with their profile and utilized during the ordering process.
● Show item level VAT amounts in Shopping Cart: Select this option to show the actual calculated VAT amounts at the item level in the Shopping Cart.
● Show item level VAT rate in Shopping Cart: Select this option to show the VAT rate at the item level in the Shopping Cart.
● Sort
first by display priority, then by name: This
will cause catalog items to be displayed in order of priority you specified
on the Categories page.
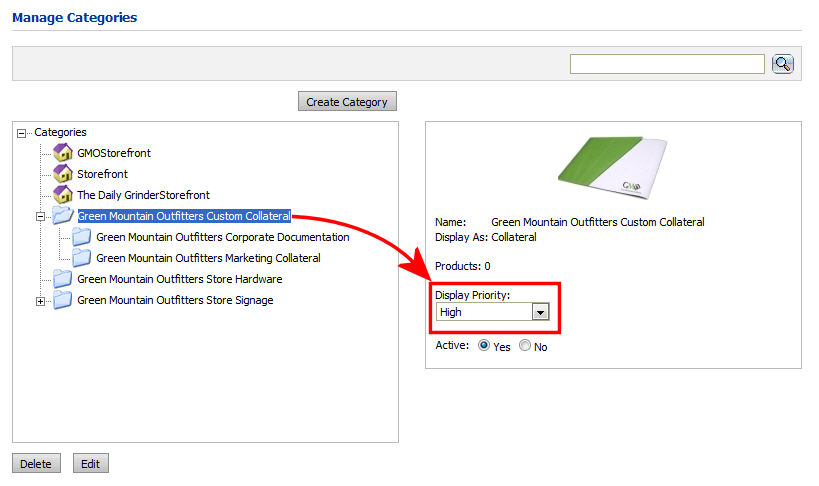
● Sort only by name: This will cause the system to ignore any priorities you specified on the Categories page and instead list the categories in alphabetical order by name.
● Enable Fulfillment Shopping: This will cause buyers to be presented with fulfillment shopping options on the storefront.
● Enable List View (i.e., Table): This will cause the products to be presented to buyers in a table format.
Note: This can facilitate easy selection of multiple products that buyers can add to their shopping cart at once using Add All to Cart. If you do not select Enable List View, the products will be displayed in grid view (the standard "block style").
1. If you are an advanced user proficient in HTML and CSS and understand the risks, click Click Here to Enable Advanced Customization.
2. Read the disclaimer—"I understand that the changes made to this page will affect the appearance of the site and the vendor will not be held responsible for any design issues"—and then click I Agree if you want to continue.
3. Follow the steps in the sections below to learn about the layout of SmartStores and available editing tools and complete various customization tasks:
● Overview of the advanced customization tools
● Edit the CSS styling for the storefront
● To discard the edits you have made to the CSS
● Edit Page Sections and Sub-Sections
● To add a page section to a SmartStore page
● To delete a page section from a SmartStore page
● Edit the HTML template for a page or page element
● Restore your site to the default: To discard all edits to the storefront: Revert
Before you begin customizing a SmartStore you should understand how SmartStores are constructed. SmartStores consist of pages, sections, sub-sections, and elements (HTML).
● Pages: SmartStores consist of many pages, such as StoreFront, Shopping Cart, and various pop-up message pages.
● Sections: SmartStore page contain one or more sections. For example, the Storefront page will typically contain at least Header, Body, and Footer sections.
● Sub-sections:
Each main page section can contain sub-sections, each with its own governing
CSS styles.
For example, a Header can include two sub-sections—a
Top Bar and a Secondary Bar.

● Elements: Each page sub-section will contain one or more HTML elements that determine the layout and content of that section.
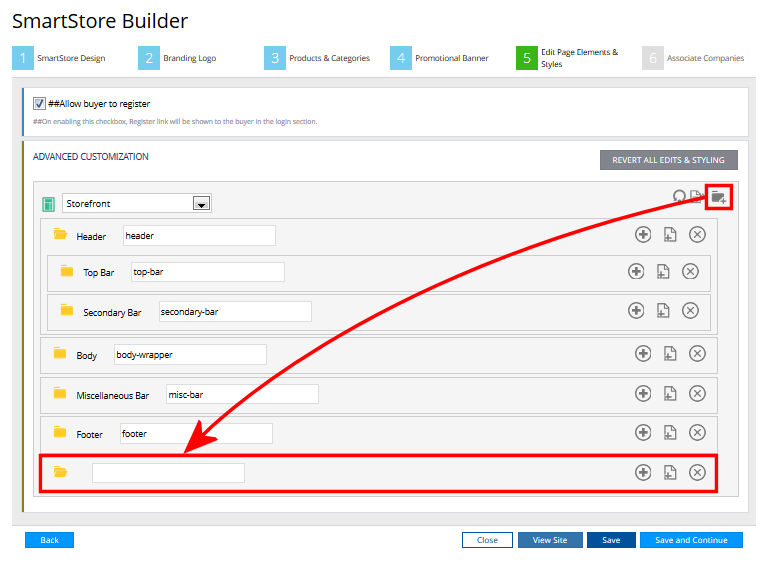
The advanced customization page provides access to various tools you can use to edit your SmartStore's look and layout by making changes to the underlying HTML code and CSS styles.
The main elements on the advanced customization page are: 1 - the page template selector, 2- the global editing tools, and 3 - the page section editing tools.
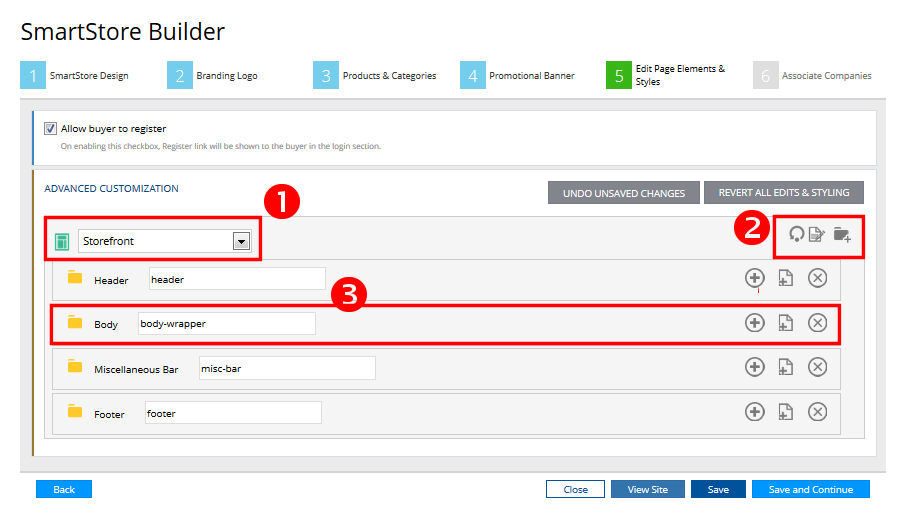
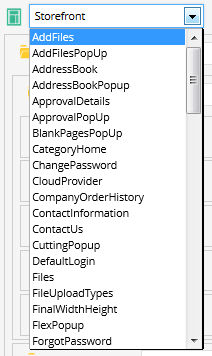
1 - Page Selector: From the pull-down list, select the page template you want to edit.
Note: The default template page is Storefront. This template governs the main SmartStore storefront page on the buyer side of your site. Each template has four main sections: Header, Body, Miscellaneous Bar, and Footer.
2 - Global Editing Tools: The three global controls that govern the page template are: Revert, Edit CSS, and Add Page Section.
●  Revert: Click to cancel all changes
you have made to the HTML and CSS for the selected page and revert to
the default. Choosing this option will also result in the deletion of
any new page elements you added to the page.
Revert: Click to cancel all changes
you have made to the HTML and CSS for the selected page and revert to
the default. Choosing this option will also result in the deletion of
any new page elements you added to the page.
Warning: This action cannot be undone.
Note: You will be asked to confirm your decision: "Revert all edits made to page elements in this page including HTML changes and CSS styling. Any new page elements added to this page will be deleted. This action cannot be undone. This action will not affect other areas like SmartStore design section, branding (logo) etc."
● Click Cancel to keep any changes you have made to the page elements on this page.
● Click Revert to undo all of the changes you have made to the page elements on this page.
●  Edit CSS (Cascading Style Sheet):
Click to edit the style sheet for your storefront. Each SmartStore storefront
has a single CSS (cascading style sheet) that defines all styles for the
storefront. Make your changes directly on the style sheet.
Edit CSS (Cascading Style Sheet):
Click to edit the style sheet for your storefront. Each SmartStore storefront
has a single CSS (cascading style sheet) that defines all styles for the
storefront. Make your changes directly on the style sheet.
● Click Cancel to keep any changes you have made to the CSS.
● Click Revert to undo all of the changes you have made to the CSS.
●  Add a Page Section: Click to add
a section to the selected page.
Add a Page Section: Click to add
a section to the selected page.
3 - Paqe Section Editing Tools:
All pages and sub-pages are made to expand and collapse (e.g., click the Header folder to expand or collapse the page elements beneath it; click the page elements such as Top Bar to expand or collapse the HTML snippets beneath it) and can be dragged and dropped to a new location in the layout tree, which will affect the order in which they are displayed on the storefront.
Note: On the Advanced Customization page, the pages and elements are arranged in the order in which they appear on the storefront. You can change the order by dragging and dropping.
●  : Click to add a sub-section to the page section.
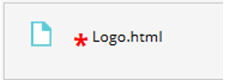
●  : Click to either add or create an HTML page element for the section.
After creating a page element, the page element will appear with a red
asterisk that indicates that it is a change you have made (i.e., not part
of the shipped SmartStore).
: Click to either add or create an HTML page element for the section.
After creating a page element, the page element will appear with a red
asterisk that indicates that it is a change you have made (i.e., not part
of the shipped SmartStore).
●  : Click to delete the section, subsection, or HTML page element.
Each SmartStore storefront has a single CSS (cascading style sheet) that defines all styles for the storefront.
Each class or ID in the HTML corresponds with a CSS entry, which defines
how all instances of that class look or behave:
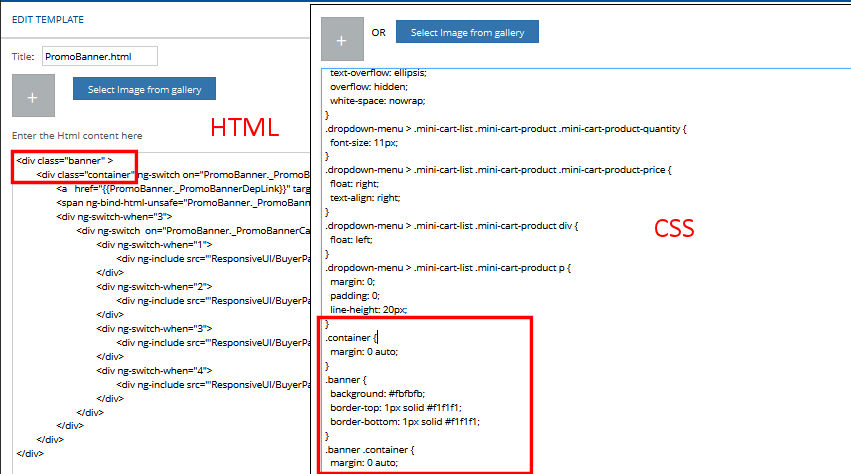
HTML cannot hard-code data and content that will be generated dynamically by the .Net code, such as the product listing, which is variable and subject to change. MarketDirect StoreFront handles this by inserting logical tags that we call "dynamic content tags" (DCT).
These are a critical part of editing HTML. Please be careful not to delete any of these DCTs when you are editing your SmartStore's HTML. If you delete these tags: you can revert the page, revert the storefront, re-code it if you have written it down for safe keeping (or printed the code), or look for it in another storefront and copy it.
These dynamic content tags are set off in double angled brackets: {{ ... }}
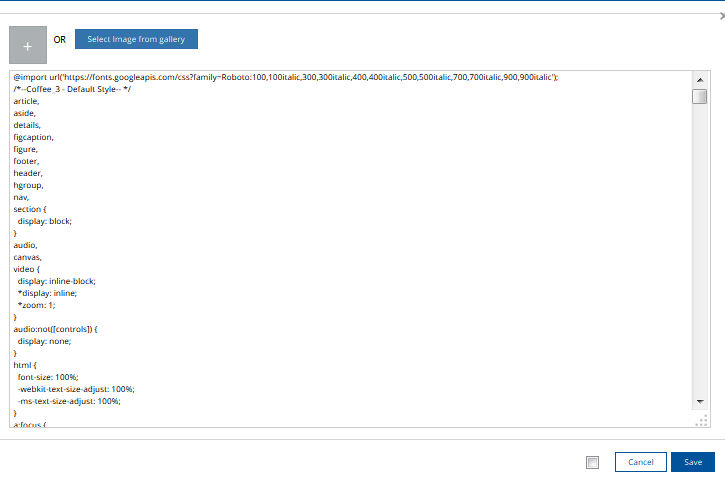
1. Click
the CSS editor icon to open the style sheet.
Note: You can copy the style sheet and paste it into an external CSS editor of your choice to use advanced editing tools, color format code, etc. Make a personal backup of the CSS style sheet to keep older versions of changes. Using an external editor will make it easy to save revisions. This will help prevent you from having to use the revert button and lose all changes you have made.
2. To add an image to the style sheet, either:
● Click Select image from gallery and then, on the Storefront Template Image Gallery, click the image to select.
or
● Click
the add image icon .
● On the File Upload window, browse to and select the logo image.
● Click Open.
3. Examine the style
sheet and make any changes directly on the style sheet.
4. Click Cancel to keep any changes you have made to the CSS.
5. Click Revert to undo all of the changes you have made to the CSS.
To discard the edits you have made to the CSS
1. To
discard all changes you have made to the CSS and revert to the default,
click the Revert
icon.
Warning: Note that choosing this option will discard not only all CSS edits you have made but also all changes you have made to the also result in the deletion of any new page elements you added to the page. This action cannot be undone.
Note: You will be asked to confirm your decision: "Revert all edits made to page elements in this page including HTML changes and CSS styling. Any new page elements added to this page will be deleted. This action cannot be undone. This action will not affect other areas like SmartStore design section, branding (logo) etc."
2. Click Cancel to keep all of the changes you have made to the page elements on this page.
3. Click Revert to undo all of the changes you have made to the page elements on this page.
You can add page sections and sub-sections to any SmartStore page.
To add a page section to a SmartStore page
1. From
the page element selector pull-down list, select the page to add a section
to.
2. Click the add a
page section icon .
3. Enter a name for the page section.
4. To add a page element for the page section:
● Click .
● An Add Template window will open:
● Enter a Title for the page element, with the .html extension appended to the title.
● To add an image to the page section:
Note:
The supported image formats are JPG, GIF, PNG, BMP.
The recommended size is 250 pixels by 70 pixels.
Image file size should not exceed
2 MB.
● Click
the add image icon .
or
● Click Select image from gallery and then, on the Storefront Template Image Gallery, click the image to select.
● On the File Upload window, browse to and select the logo image.
● Click Open.
● Enter the HTML code in the text box.
● If you want to apply the changes you made to the current template to all page views, click the check box.
● Click Save.
5. To add sub-sections
to a page section, click .
To delete a page section from a SmartStore page
1. From the page template selector pull-down list, select the page to delete a section from.
2. On the page section
row, click the remove a page section icon  .
.
Each SmartStore section or sub-section has a page element that defines the content in the section.
1. On
the row with the page element you want to edit, click  to open the Edit Template popup window.
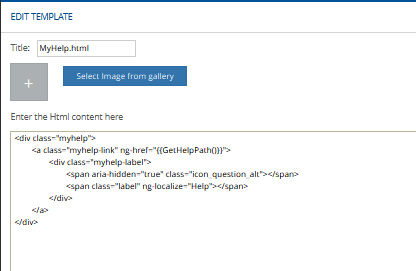
2. On the Edit Template page:
● You can edit the Title for the HTML element.
Note: For HTML elements, the Title should have a .html extension.
● To add an image to the page section:
● Click Select image from gallery and then, on the Storefront Template Image Gallery, click the image to select.
or
● Click the add image
icon .
● On the File Upload window, browse to and select the logo image.
● Click Open.
● Enter the HTML code in the text box.
Note: You can also select the HTML in the Edit Template window and copy-and-paste it into the HTML editor of your choice to take advantage of the HTML editor’s advanced editing capabilities.
● If you want to apply the changes you made to the current template to all page views, click the check box.
● Click Save.
3. Select the display option for the HTML: Always, PreLogin, PostLogin.
Note: This specifies whether the HTML element will be displayed at all times (Always) or only before a buyer logs in (PreLogin) or only after a buyer logs in (PostLogin).
1. If you want to discard all changes you have made to the storefront—including changes you have made to the HTML and CSS to all pages and page elements and any new pages or page elements you added to pages--and revert to the default, click Revert All Edits & Styling.
Warning: This action cannot be undone.
Note: If you want to discard only any unsaved changes you have made, click Undo unsaved changes.
2. You will be asked to confirm your decision. Be sure to read carefully the information message that reads:
"Revert all edits made to page elements in all pages including HTML changes and CSS styling. Any new page elements will be deleted. This action cannot be undone. This action will not affect other areas like SmartStore design section, branding (logo) etc." Click Cancel or Revert all edits made to page elements in all pages including HTML changes and CSS styling. Any new page elements will be deleted. This action cannot be undone. This action will not affect other areas like SmartStore design section, branding (logo) etc."
3. Click Cancel or Revert.
4. Click Save to save your changes or Save and Continue to go to the next step.
Note: You can also click 4 Promotional Banner icon in the SmartStore Builder navigation menu.
Note:
When you associate a storefront with a company, all users in the company
will see the customized storefront when they login.
Please note that the list of companies will contain only those that have
not already been assigned to a storefront. To associate a company with
the storefront, you must first disassociate from the company it is currently
associated with.
1. To
associate the storefront with a company, click Associate
Company.
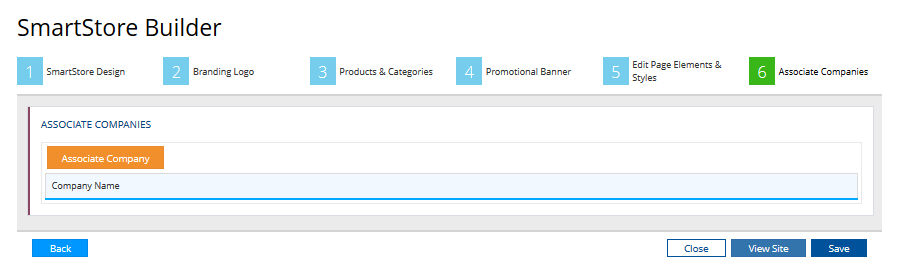
2. On the Associate
Companies window, select the company(ies) to associate with the storefront.

3. Click Save.
● Storefront Customization - Managing Storefronts
● Overview of Storefront Management - Customization
● To set a storefront as the default
● To view the companies associated with a storefront